skip to main |
skip to sidebar
FaceFilter
is a standalone PC-only program that lets you correct human faces in
photos - letting those uninitiated in the ways of Photoshop easily
retouch the one person who can never crack a smile for photos, or blinks
at the mere thought of a flash strobe. The company has recently
released an updated version of the program, FaceFilter Studio 2,
and we tried it out to see what's new. After a couple of hours with the
program, we found it to offer some pretty useful changes, but still has
some curious limitations we'd like to see removed in future versions.
FaceFilter
Studio 2 has undergone a facelift that gives it a neutral gray color
scheme and some updated icons, but overall the layout is almost
unchanged from the previous version. The process of retouching photos
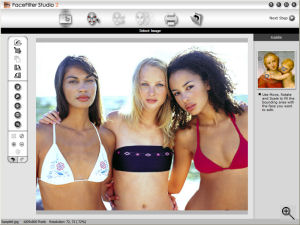
begins by selecting an image and choosing the area to work on, a process
that is largely unchanged. Precisely selecting the area of a face
that's tilted can be a bit frustrating, because you must first make a
rectangular selection, then rotate it - and you can't change the
dimensions of your rectangle once you've initially created it. The
corner of the selection box cannot extend outside the screen when
rotated, either - meaning that selecting tilted faces near the edge of
the photo can be difficult.
You can adjust the color balance and
brightness at this stage, or opt to have the program try to do so for
you. A "Smart Portrait" function attempts to identify the dominant face
in the photo, and adjust the overally image so as to improve the skin
tone of this face. You can also manually identify the location of
multiple faces in the photo, and then let "Smart Portrait" mode do its
work. Results from this mode tend to be extremely contrasty - a look
that will probably go down better with the average consumer than the
amateur photographer. Of course, the average consumer is FaceFilter's
intended audience. Finally, a Red-Eye Reduction function (moved from the
Enhance Skin screen where it was located in the previous version)
attempts to automatically locate and correct for red-eye in photos,
while allowing you to manually indicate the location of red-eye should
the program fail to pick up on it.
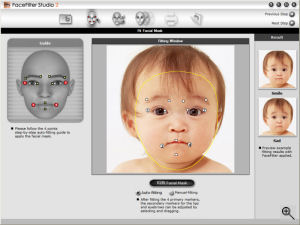
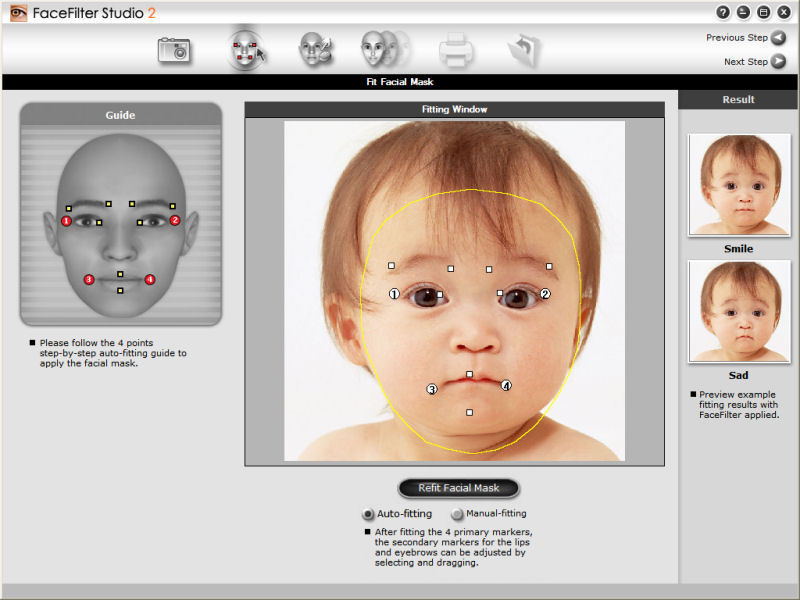
You
then fit a "facial mask" to the image, essentially telling the program
how your subject's face is positioned. This step is essentially
unchanged. The program can guess at the positioning of eyes, eyebrows,
mouth and facial outline by itself, but this is still rather hit and
miss - especially given the improvements in facial recognition
technology over the last few years. Still, it may save a little time
over completely manual positioning on some photos. Alternatively, you
can locate four key points - the outer corners of the eyes and lips -
and then the program will overlay the remaining key points in roughly
the right places. You then drag and drop these remaining pointers to
their correct locations. As with the location of facial features, the
facial outline can be tweaked to try and match the face as closely as
possible. It is also possible to fine-tune the results of automatic
fitting.

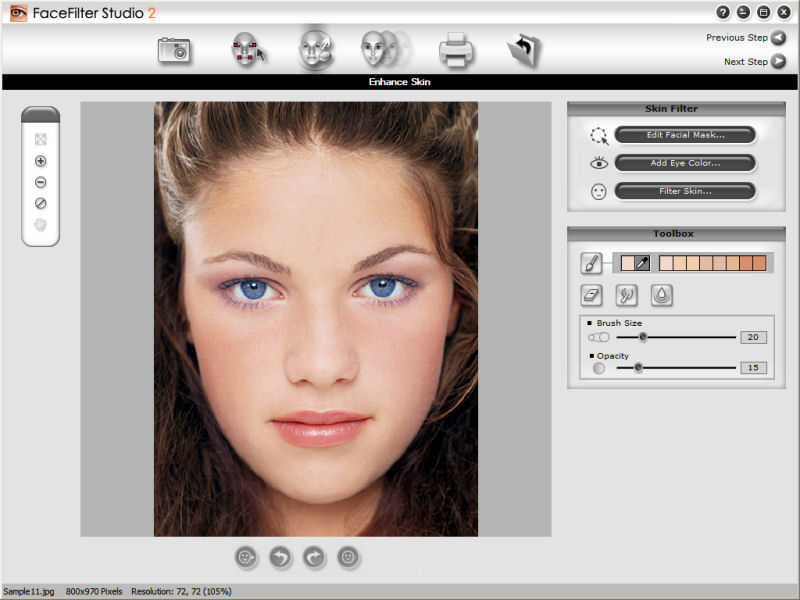
The
next step is largely unchanged, with the addition of one new feature.
The "Enhance Skin" screen lets you remove red-eye and skin blemishes, as
well as adjusting overall skin tone. You can opt to make manual smudge,
smooth or paint adjustments to the image, and a restore brush assists
with correcting errors or fine-tuning adjustments. In place of the
Red-Eye Reduction function, a new "Add Eye Color" function lets you
change the color of your subjects' eyes.
An
"Edit Facial Mask" tool lets you alter the mask automatically generated
earlier. By default, the area inside the face outline is selected, less
areas around facial features such as eyes and mouth. You can fine-tune
this mask using a feathered manual adjustment, or by looking for areas
of the image that match the selected skin-tone.
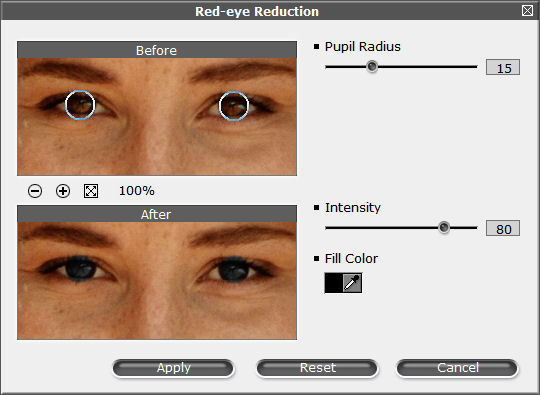
The
"Add Eye Color" screen - incorrectly labelled as "Red-Eye Reduction" in
the version of the program we reviewed - automatically guesses the
location of your subjects' eyes and allows you to change their color.
You can fine-tune the locations, and alter the pupil radius and color
intensity, as well as choose the color you'd like to use. However, you
can only two circular pupils of identical sizes- meaning that if your
subject isn't looking directly at the camera, or has their eyes
partially closed, it is difficult or impossible to change the color of
the pupil without also discoloring the eyelids.
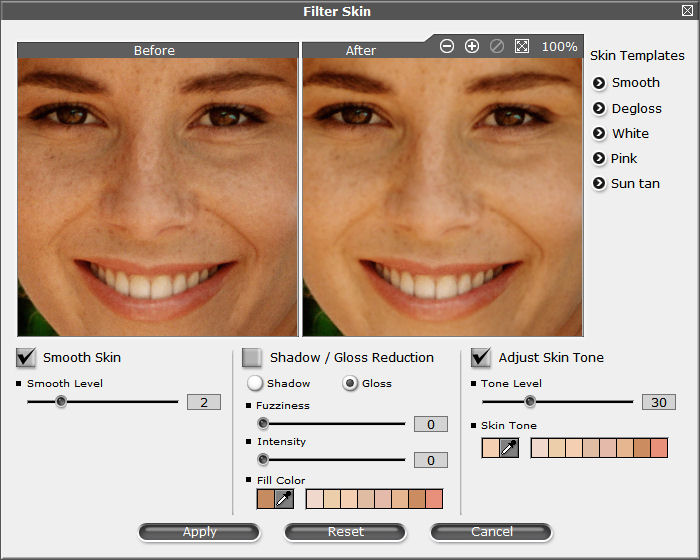
This
facial mask is used by the "Filter Skin" tool, where the masked area
can be blurred, shadow/highlight areas filled with flesh tones, and the
overall skin tone adjusted.
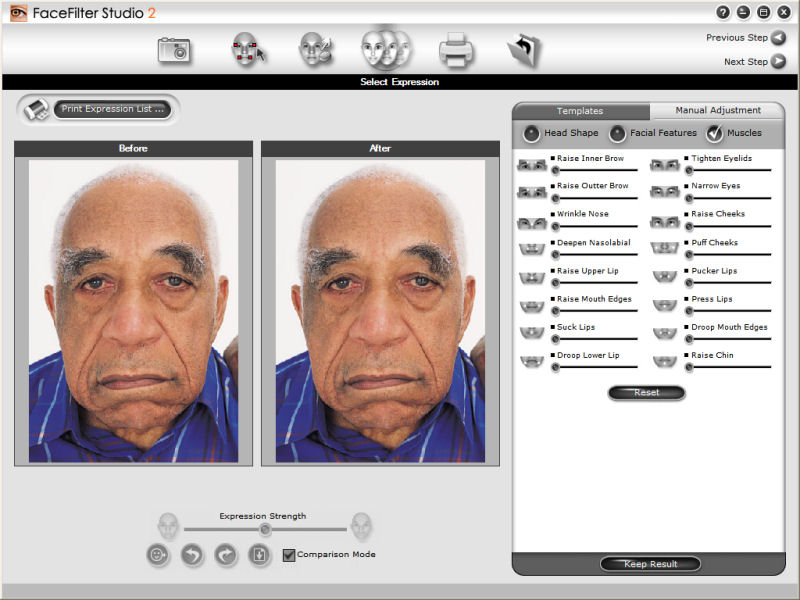
The
Select Expression screen, where you can choose from numerous preset
facial expressions to apply to your image, is almost identical to that
in the original program. The only change of note is the addition of a
"Print Expression List" button. You can still adjust facial expressions
in a number of ways - by choosing from one of over fifty presets
(roughly half each in categories called "Attractive" and "Fun"), apply
your own custom presets, or manually adjust the expression. When
manually adjusting, your options include head shape (proportion and
width), facial features (size, position and orientation for eyes,
eyebrows, nose and mouth), or finally the "Muscles" tab. This last
deserves a little more explanation as it is probably the most intuitive
way to adjust facial expressions manually - a variety of choices include
items such as "pucker lips", "droop mouth edges", "tighten eyelids" or
"wrinkle nose", each with a slider to adjust the intensity of the
effect.
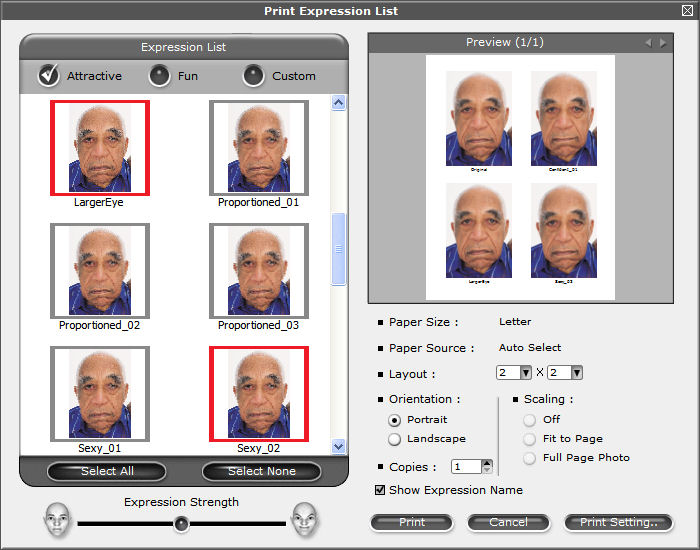
The
new "Print Expression List" button brings up a screen where you can
select from expressions you want to see on paper, and print them side by
side, tiled appropriately. Not a feature that you're likely to use
extremely often perhaps, but still useful to have for when you want to
preview a range of different expressions and choose the one you most
like.
Also new to the program is a fairly basic print mode,
wherein you can preview your edited and original image, then crop as you
like and make a print with or without scaling.
Image exporting
is much the same as the original program, allowing you to copy the
results to the clipboard or save them as a new file. In the Export
screen, you can also choose to select another face in the image for
editing.
Overall, the new features may make FaceFilter Studio 2
more attractive to new users, and some - such as the new support for
printing direct from the program - may persuade existing users to
upgrade as well. As with the previous version there's not really
anything in FaceFilter Studio that somebody with a good knowledge of
Photoshop couldn't do by themselves, but that's still not the point.
FaceFilter is really aimed at users who don't have Photoshop skills, or
just want to be able to edit their photos quickly rather than spending
time trying to get good results in Photoshop manually. At this, the
program excels.
With that said, some of our comments about the
original program remain. One limitation that makes little sense is an
arbitrary limit of 12 megapixels on image size (the original FaceFilter
was limited to three megapixels, while FaceFilter Studio 1.0 was limited
to 12 megapixels). Granted, this higher limit is plenty for current
consumer digicams, but given that resolution is continuing to rise, this
may soon prove more troublesome. We still feel it would also be nice to
see an option to deselect facial elements you didn't want adjusted when
selecting a predefined template (for example, if the eyes were partly
obscured in the photo, the rest of the template might still be useful to
you). It would also still be more intuitive to show the values being
applied by a selected template on the manual adjustment page, to allow
users to fine-tune existing templates rather than having to make new
ones from scratch (if you first select a template and then go to the
manual adjustment page, all of the sliders are still set to zero as if
the template was part of the original image).
Pricing for
FaceFilter Studio 2.0 has been raised some $10 to the current $59.95.
Existing users can upgrade to the new version for a cost of $19.95.
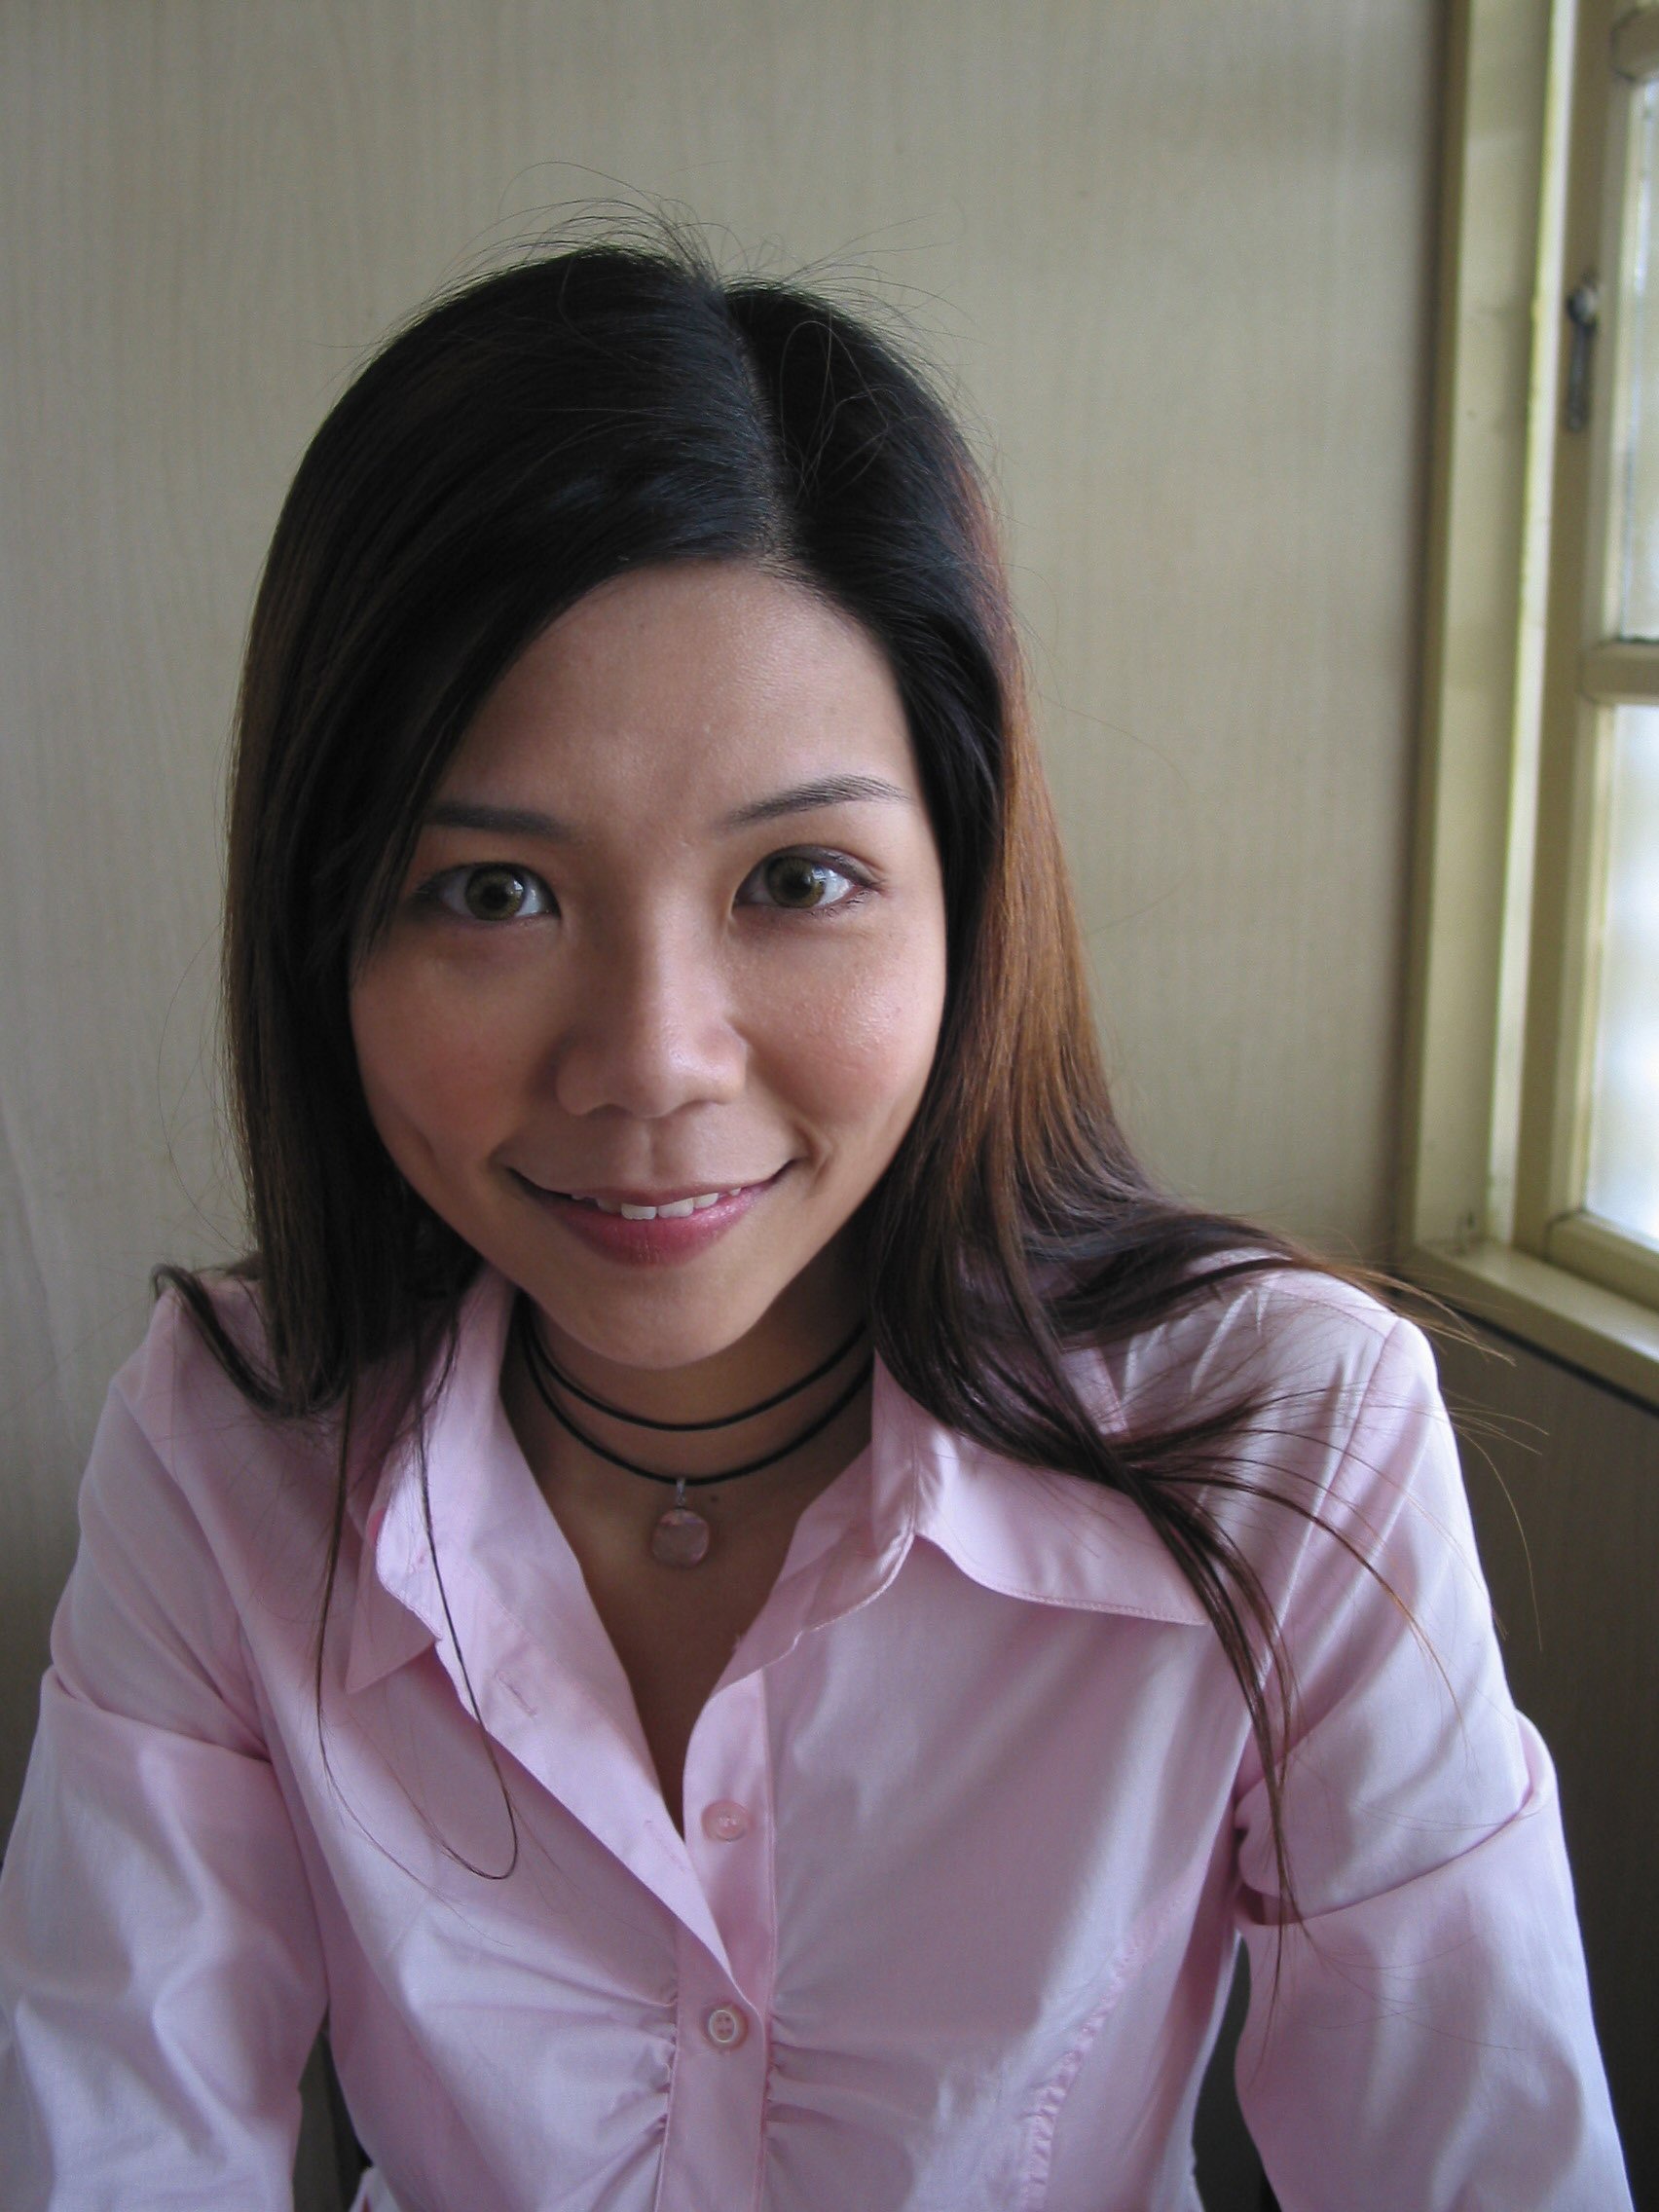
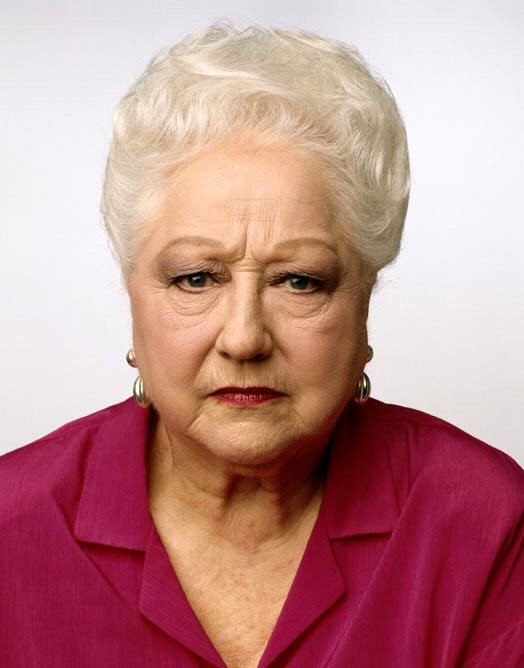
Following
are a couple of before/after example images made with FaceFilter Studio
1.0 for our previous coverage of that program's launch (the results
being essentially the same as that you can expect of the current 2.0
version). The first shows a more subtle change, slimming the face and
spacing the features more vertically, plus adjusting the skin tone. The
second image is more strongly edited, using a templated facial
expression that was then manually tweaked to make the expression less
severe, and with skin blemishes automatically blurred somewhat. Both
images were made in a couple of minutes, within an hour or two of first
trying the program.:
Download
Posted in
Software